Tailscale split DNS without conflicts
Introduction
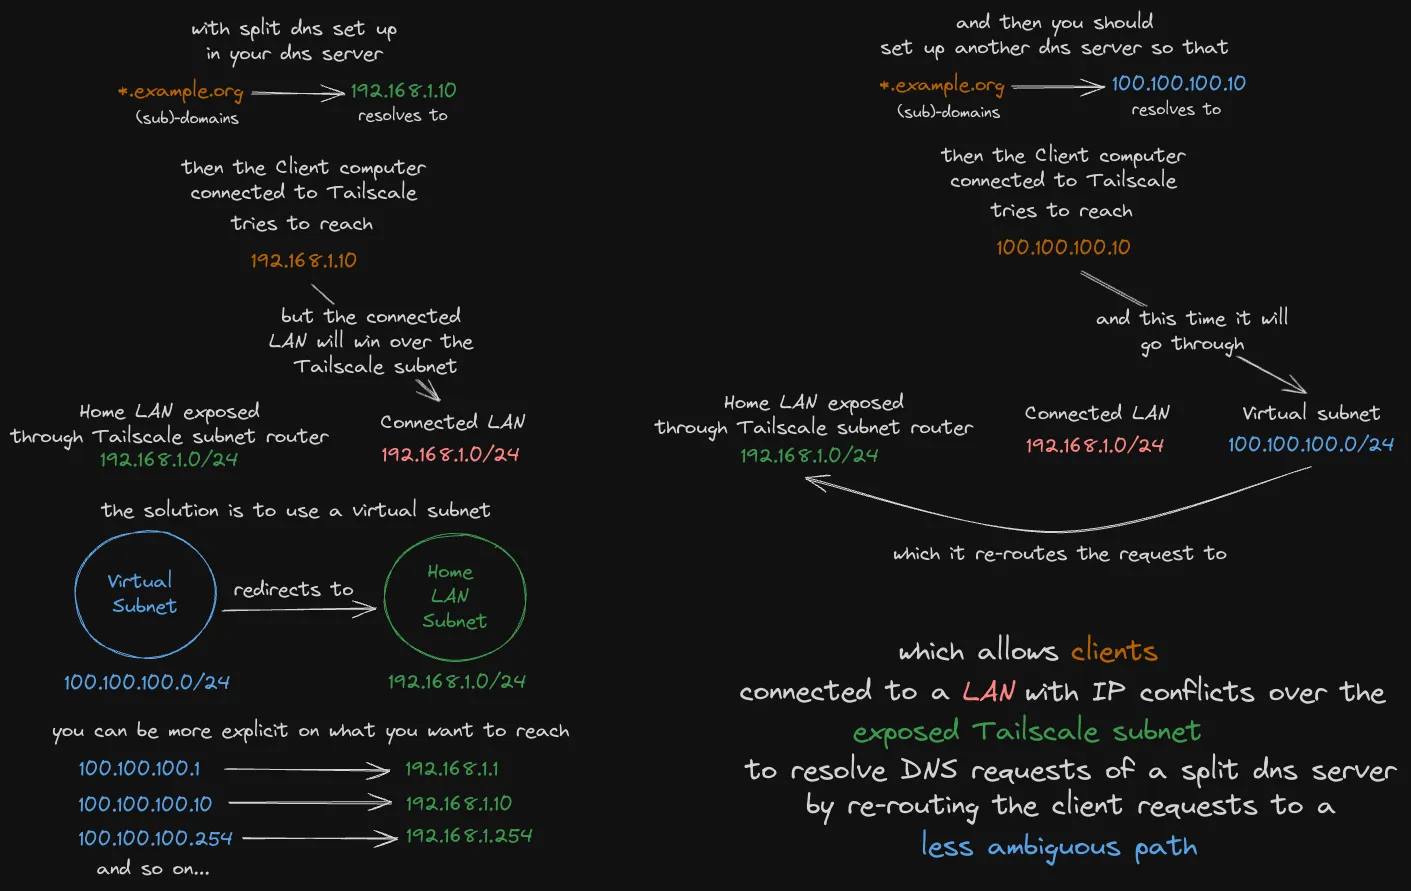
When using Tailscale to access your home network remotely, you might run into IP address conflicts if your home network’s subnet overlaps with the network you’re connecting from. This can stop you from accessing services on your home network using local DNS names. Plus, setting up split DNS for Tailscale can be a bit tricky when dealing with these conflicts.
This guide offers a solution to this problem by implementing a virtual subnet and configuring Tailscale with split DNS. By following these steps, you’ll be able to access your home network services using local DNS names, even when you’re connected to a local network with conflicting IP ranges.
Guide
You should follow this guide on the machine that has Tailscale installed in your network. For this guide, I’m using Debian, but the same commands can be used for Ubuntu as well. With the exception of apt commands, it should work with any other Linux distribution that has iptables installed.
1. Set up the virtual subnet
The virtual subnet allows us to alias our LAN subnet to an IPv4 range that should be free in any local network, to avoid conflicts when connected to another network.
My LAN subnet is 192.168.1.0/24 and the range I’ve decided to use for my virtual subnet is 100.100.100.0/24, you should change these based on your LAN range and preferences.
sudo iptables -t nat -A PREROUTING -i tailscale0 -d 100.100.100.0/24 -j NETMAP --to 192.168.1.0/24
Check that the new rule has been added correctly to iptables by using:
Then you can persist these changes to iptables by using iptables-persistent. I’m on Debian, so I use apt to install it:
When installing for the first time, it will prompt you to save your current rules. You should press yes for both IPv4 and IPv6 rules. If you want to be extra sure that everything is saved, you can also run:
Now that the virtual subnet has been set up, you can restart Tailscale with the new virtual subnet. Make sure to change the LAN subnet and the virtual subnets if you have used different values in the iptables command.
[!NOTE] Currently SSH’ed through Tailscale and worried the connection might drop?
Don’t worry! I restarted Tailscale with this exact command while 8500km away from my server, and I didn’t even have to reconnect to the SSH server.
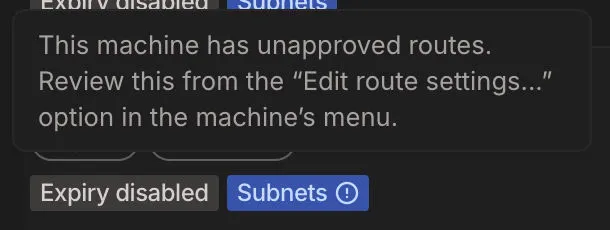
Now for the last step of this part of the guide, you should enable the virtual subnet in the Tailscale Admin Console via https://login.tailscale.com/admin/machines. When you open the page, you should see a little exclamation icon near the subnets of that machine, telling you that there are some unapproved routes.
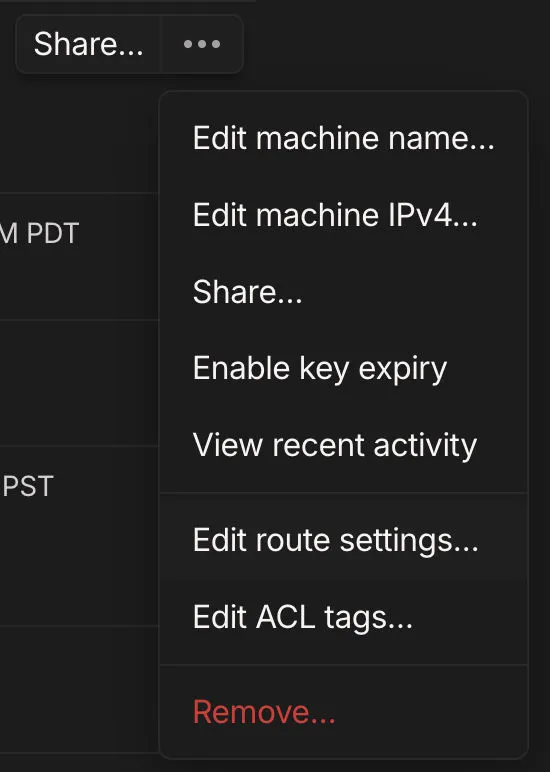
To fix this, you can just open the machine menu and click on “Edit route settings…”
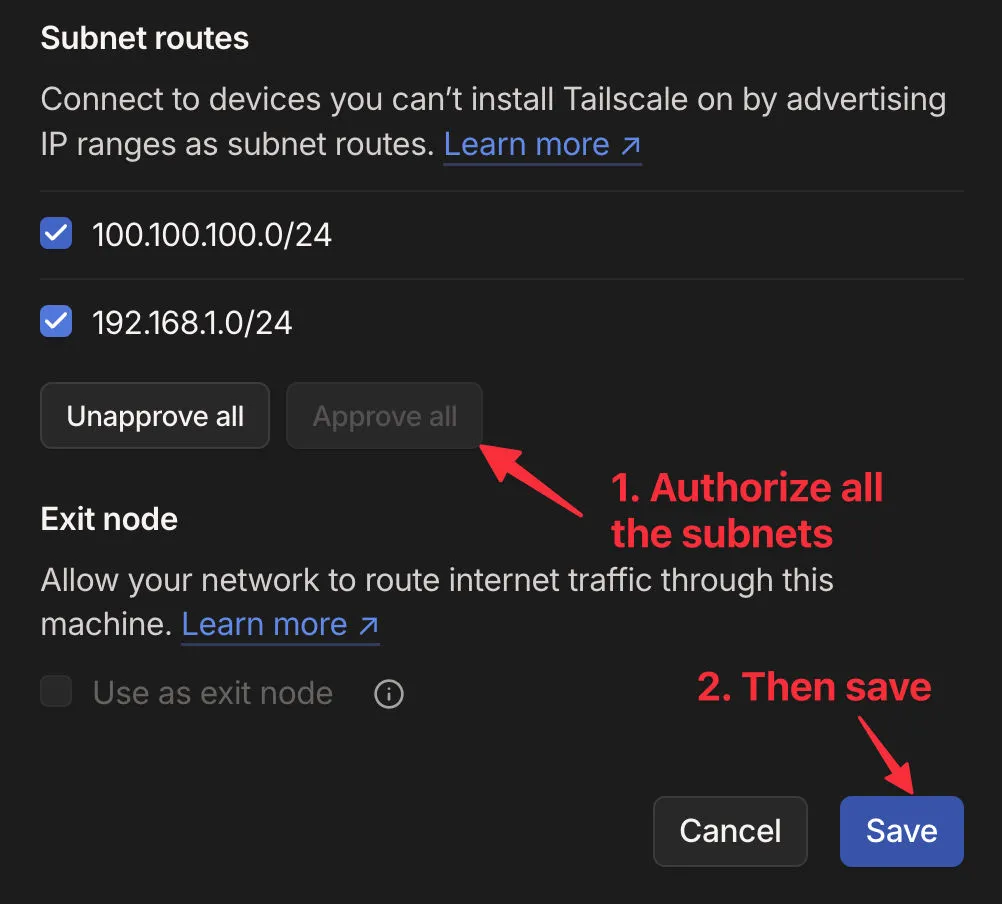
Then you just need to click on the checkbox next to the subnets that you want to authorize and save.
2. Set up the Tailscale DNS server
This part assumes that you know how to deploy a DNS server, as you probably already have one working for the split DNS in your home LAN. I’m using dnsmasq from a Pi-Hole server, but it could be anything.

Install Pi-Hole using your preferred method. I personally use Docker and already have a docker-compose file for it with the /etc/dnsmasq.d folder exposed, where I’ve added a file called 99-split-dns.conf with this content:
address=/example.org/100.100.100.10
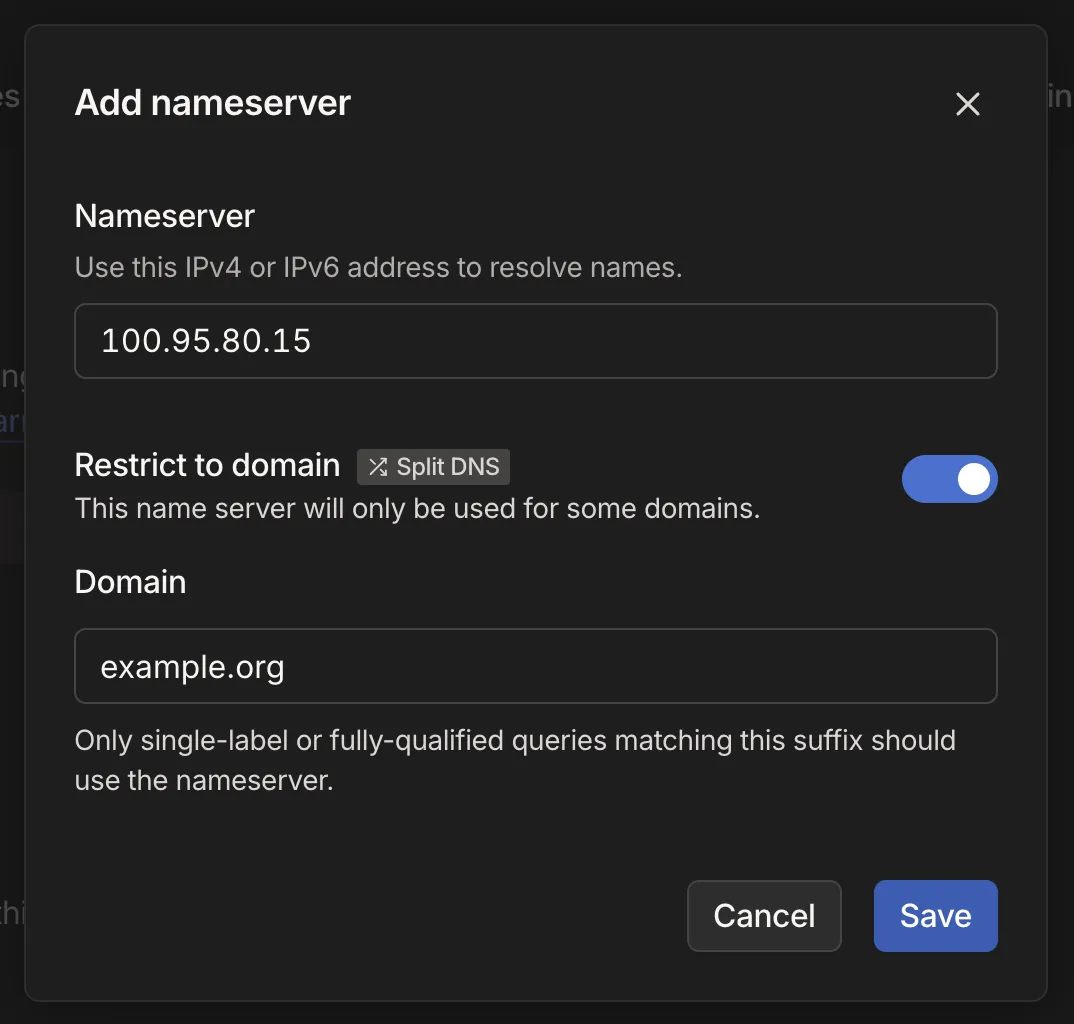
Make sure to change 100.100.100.10 with the virtual subnet address of the Tailscale DNS server.
Then in the Tailscale Admin console, set the nameserver that uses the virtual subnet under DNS → Add nameserver → Custom…
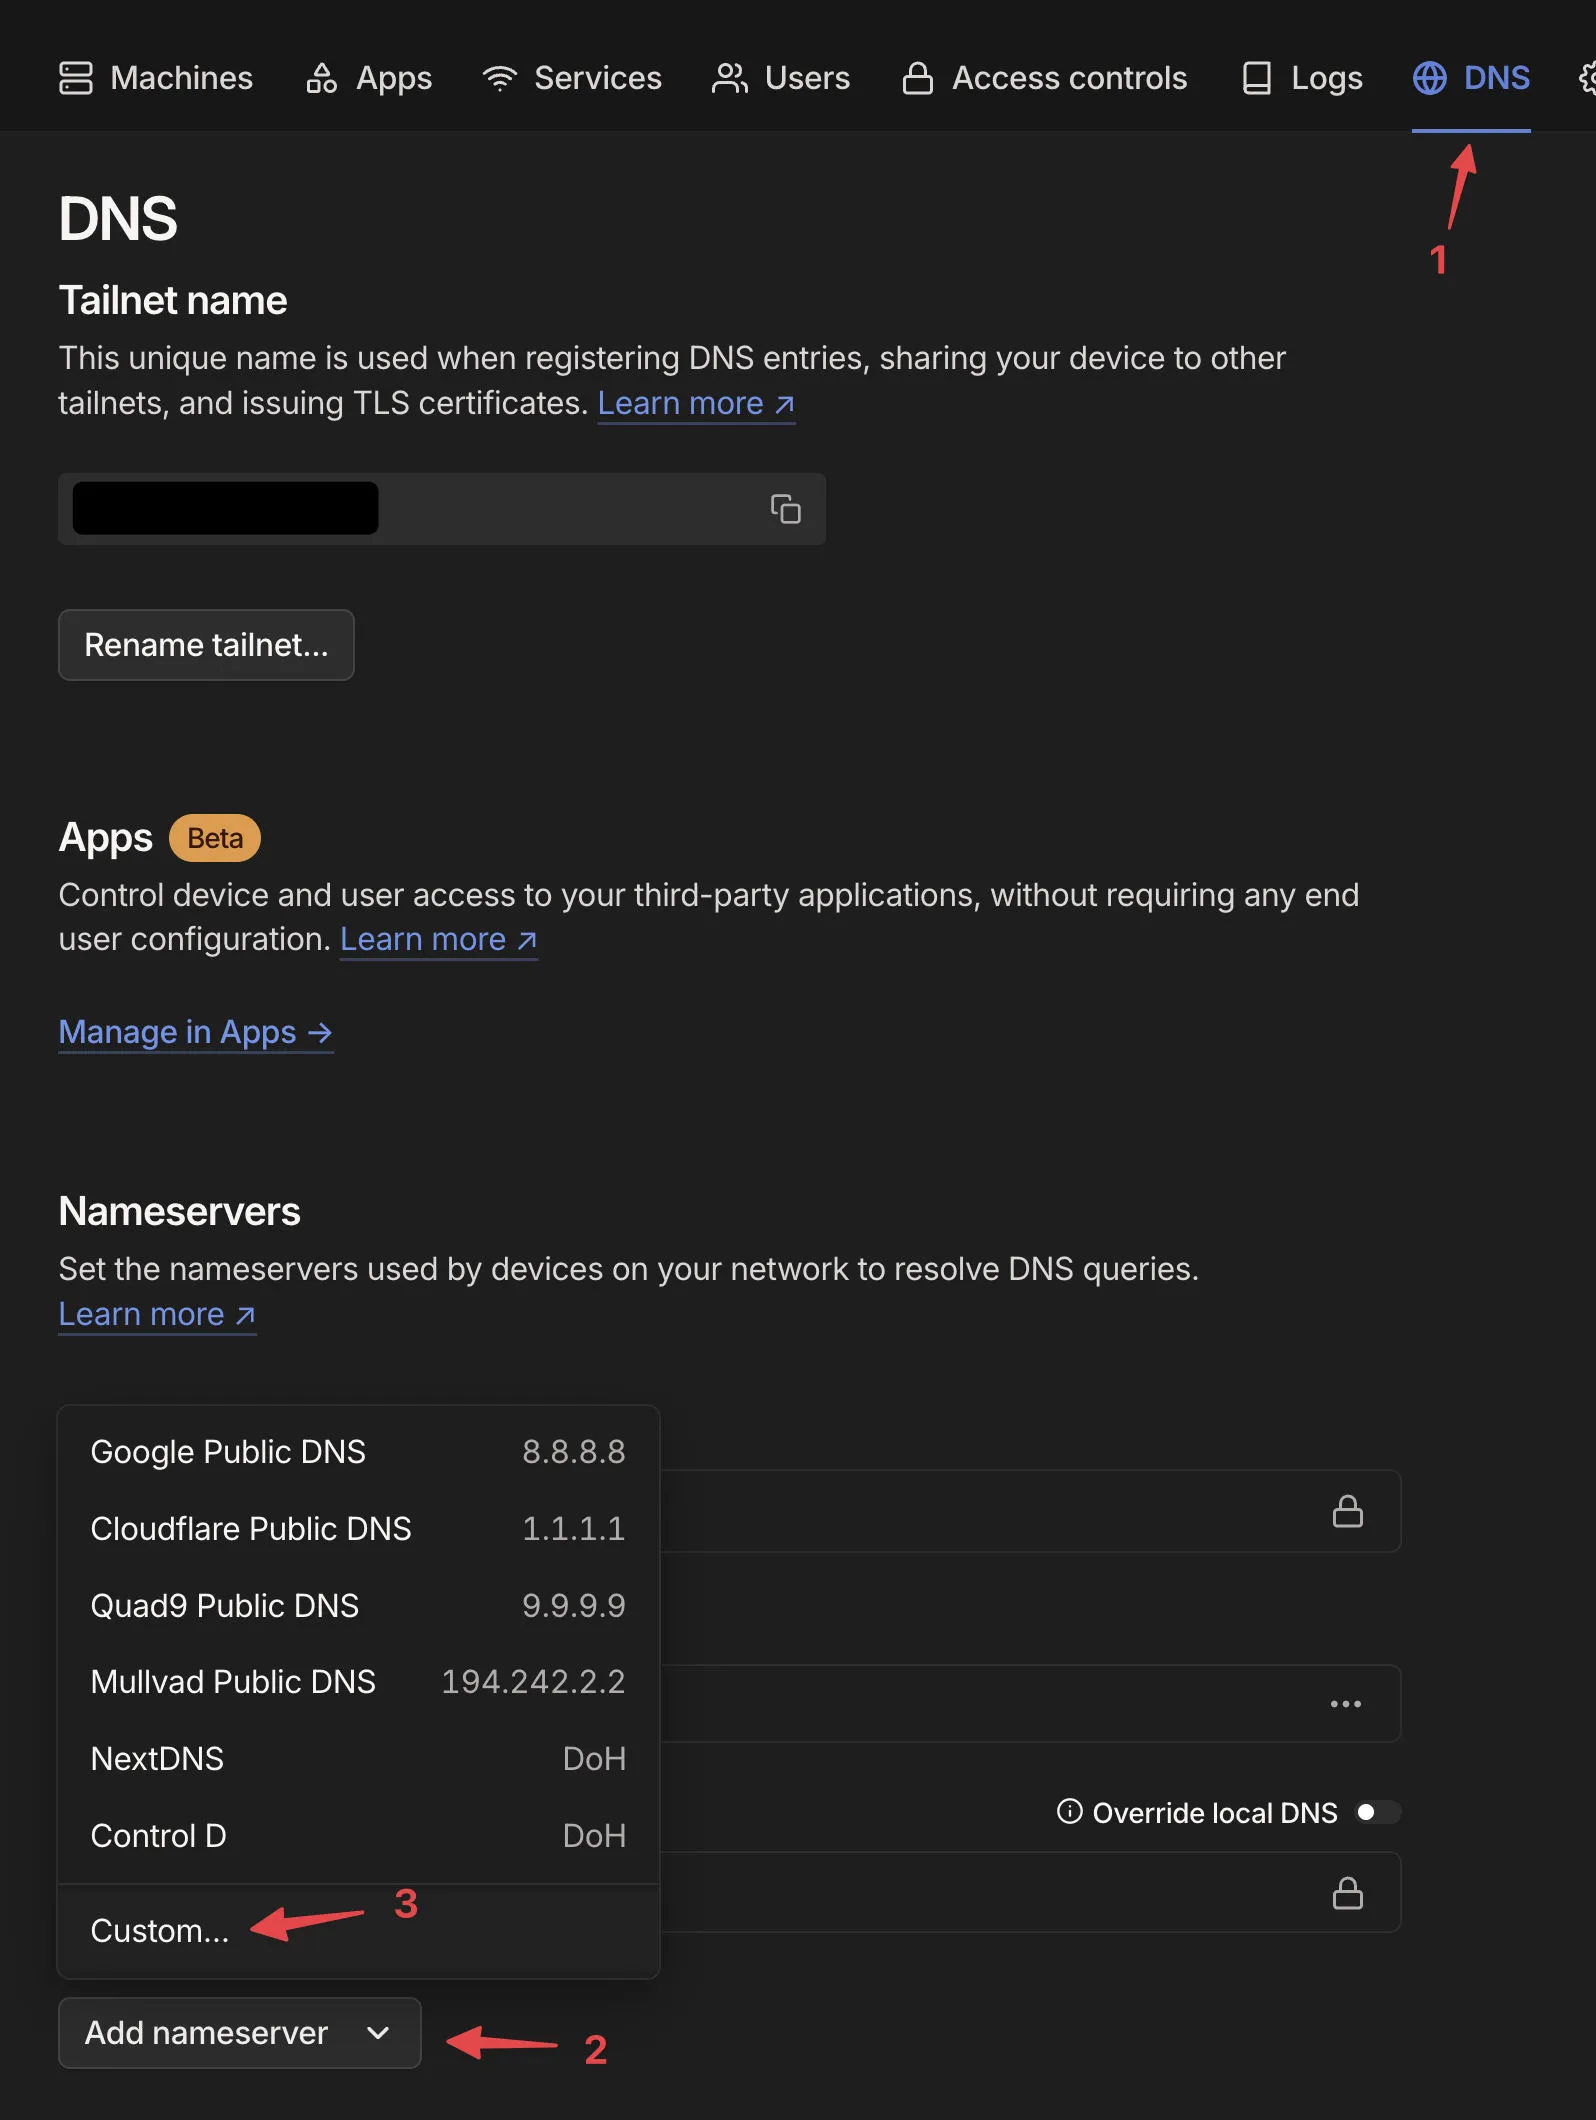
Fill out the nameserver field with the internal Tailscale IP of the machine with the Tailscale DNS server. Check “Restrict to domain” and add the domain or subdomain that you want to use for the split DNS (it should be the same as in the dnsmasq configuration).
Now when you connect to Tailscale and you’re in a LAN with IPv4 conflicts with one of your subnets, you can still reach the services under split DNS in your home LAN, as well as the services under your current LAN without conflicts.
Advice
Virtual subnet IPv4 range
I’ve chosen a range of 100.100.100.0/24 even though it’s specifically for use in carrier-grade NAT carriers because it should be free in most, if not all, LANs. This is similar to how Tailscale uses the same reserved space for the machines in your tailnet.
Acknowledgments
- Virtual subnets commands from /u/glongprr123’s reddit comment